Where Do I Find All My Agency Features?
In this article, you'll learn the easy step-by-step process of finding all of your Agency Features on ClickDesigns.
STEP 1:
One agency feature is the Custom Agency Branding, which refers to a customizable Brand Kit that you have on ClickDesigns. To access this, after you've logged into your ClickDesigns account, hover over your profile and click on "Settings."

From here, click on the tab that reads "Brand Kit" to access it.

The Brand Kit allows you to upload all of your brand elements - such as your logos/images, color palettes, and fonts - in order to instantly access them within the ClickDesigns Editor.

Another way to access the Brand Kit is if you go back to the drop-down menu of your profile and click on "Agency."

From here, click on the tab that reads "Custom Branding" to access it.

Here, you have the option to set up a Custom Branding kit for you and your team. (Don't forget to click on "Save Settings" once finished!)

You can watch this video here if you want more information regarding the ClickDesigns Brand Kit!
STEP 2:
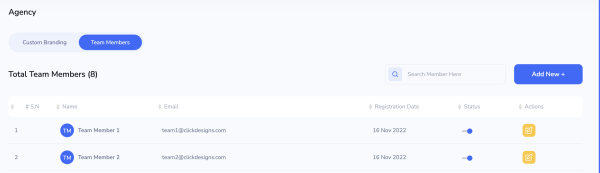
With ClickDesigns Agency, you have the ability to access a control center for your virtual team accounts. Here, you can add or remove team members, filter their access levels, and collaborate on designs with your team. To do this, first, go back to the drop-down menu of your profile and click on "Agency."

From here, click on the tab that reads "Team Members."

Here, you can manage your team members with ease.
You can read this article here if you want more information regarding managing Team Members!
STEP 3:
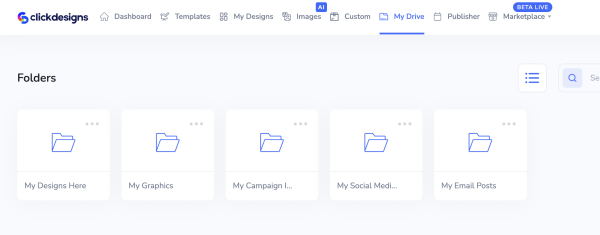
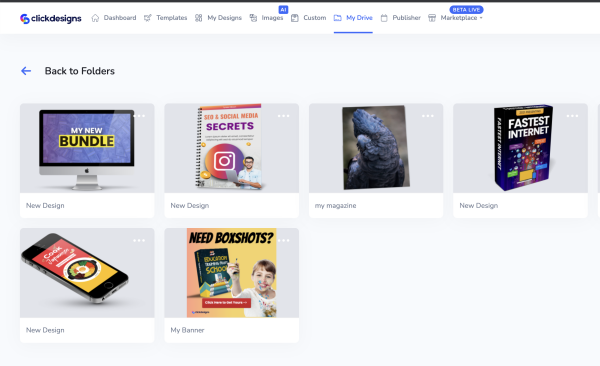
ClickDesigns Agency also allows you to share your designs with your clients with the help of ClickDrive. To access ClickDrive, first, click on the tab that reads "My Drive" at the top of your navigation menu.

Here, you can organize your designs inside your ClickDrive and share your folders with your clients as well.
You can watch this video here if you want more information regarding how ClickDrive works!
STEP 4:
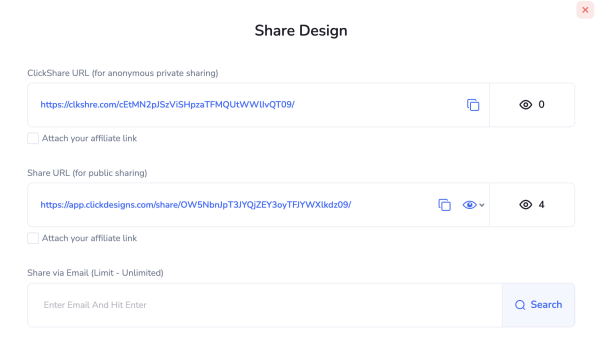
You can also share your designs either through a sharing link, or directly with ClickDrive. To do this, simply hover over any of your designs, click on the ellipsis icon, and choose "Share."

Another way to share your designs is via email.
You can read this article here if you want more information regarding sharing your designs!
STEP 5:
With ClickDesigns Agency, you can download your high-resolution designs in ClickDrive in bulk. To do this, simply hover over a design file, click on the ellipsis icon, and choose "Download All."

STEP 6:
You can also add your watermark. Here, go to the drop-down menu of your profile and click on "Settings."

Next, click on the tab that reads "Watermark."

Here, you can customize your own watermark in order to easily add them to your designs.

You can read this article here if you want more information regarding adding your own watermark!
STEP 7:
If you see any bundle template online that you would like to recreate - if in any case, it is unavailable on ClickDesigns - you can create your very own custom bundles by adding different wireframes or templates together. To do this, click on "Custom" on the navigation bar.

Then, from here, you can freely make and edit your own Custom Bundles on ClickDesigns.

You can watch this video here if you want more information regarding creating Custom Bundles!
With ClickDesigns Agency, you also have the ability to:
- Cloak your shared URL without showing your source through ClickShare,
- Showcase design portfolio samples to clients by sharing your ClickDrive folders,
- Get unlimited hosting and storage,
- And get tech support and client support help through Zoom from us.
And Voila! That's how easy it is to seamlessly access and locate all of the features that ClickDesigns Agency has to offer.